Sorry for the Hiatus everybody, I was off on vacation in
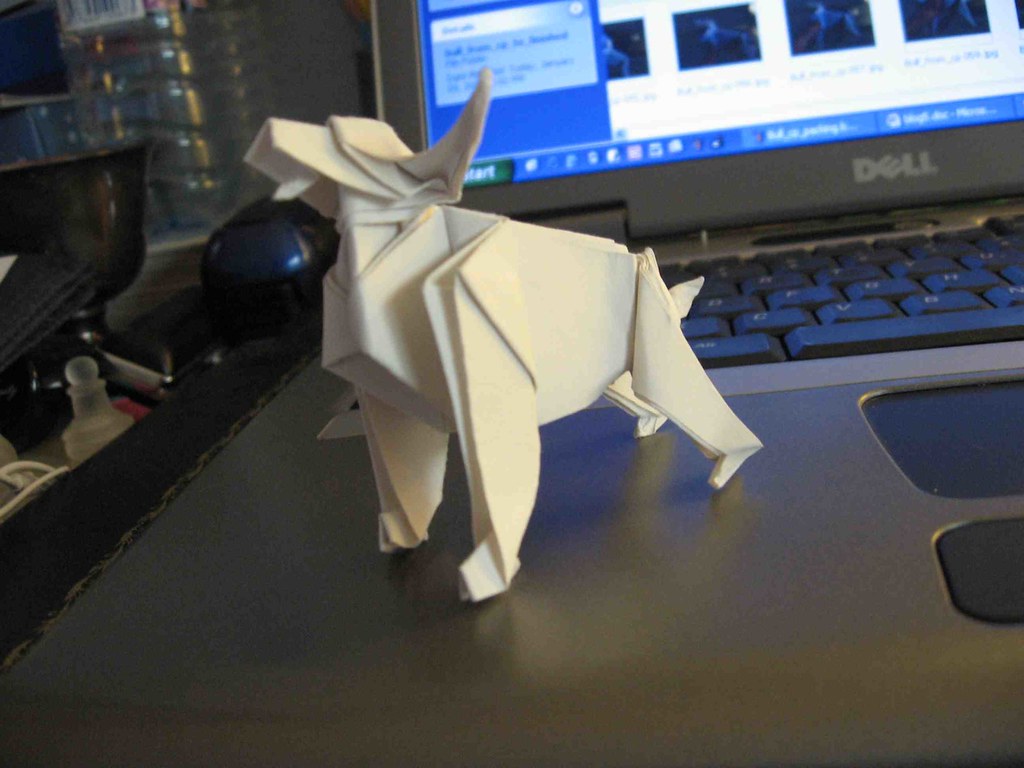
Today I tried something I’ve never really done before-- designing a model by crease pattern, using module theory. For those of you that aren’t familiar with this method, I took a tree figure for my chosen subject (in this case a bull) and made a crease pattern for it using the same triangular modules that make up most of the classic bases (the bird, frog, and fish bases). I came up with this crease pattern:
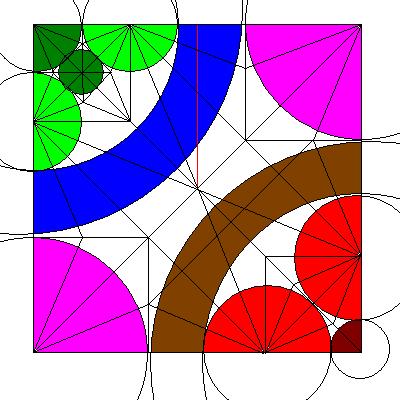
The red line on both crease patterns is for reference. On the colored version, the red are the back legs, the dark red is the tail, the brown is the torso, the purple is the front legs, the blue is the neck, the light green is the horns, and the dark green is the eyes and snout. I’m sorry about my limited paint skills, the neck and torso rivers aren’t quite shaped like that; but I don’t have the time or patience to figure out how to do it right. They aren’t too far off anyway.
But anyway, once I had this figure composed, I realized it was not very easy to fold from crease pattern, and thus the teeming masses that I hope are reading this may have trouble doing so and get stuck (but not give up, right? eh?). So I decided to blog on how to collapse crease patterns, using this as an example. For a more detailed set of directions accompanied with pictures, look in the corresponding photo set on my Flickr page. I didn't add them here because I have dial-up, and that would take too much time. First, make as many of the bigger folds as you can. Here, you fold the diagonals first, then use the reference mark (made by folding the square in half here) and bisect the area between it and the diagonals; then make the next set of folds, matching the ends of those bisectors.
One thing you want to keep an eye out for is patterns you’ve seen before; for example, on the two corners on either side of the middle section, there is the crease pattern for a half bird base; so you can pleat the center part over to the side and fold the bird base all at once.
The head and tail sections can be creased by means of a number of mountain and valley folds; then comes the tricky part of collapsing the base. Here, start with the half-bird bases on the sides; then fold the torso flap up and collapse the lines for the middle of the base. For the head, you’ll have to make the bird base on the inside in between some layers; this is no easy feat, as you must hold the layers around it flat while folding it. However, once you finish that, the base is complete.
Next comes what I think is the hardest part: shaping and finishing. This often requires a lot of vague folds that have to be estimated; but the crux of the situation is, you must make the model look like the subject using various methods from the proverbial designer’s bag of tricks. I posted a full sequence of pictures on my Flickr page; look inside the set labeled “Crease Pattern Solution: Bull” and you should find enough pictures to help you finish it off. Essentially, what I did was reverse-fold the head section upward, position the horn and eye flaps, make a nose and eyes, and curve the horns; then I positioned the legs and folded some rather mediocre-looking hooves on the leg flaps (I’ll figure out some good ones eventually, but now’s not the time), and rabbit-eared to make the tail.
A few optional things that can be done are to lock the inside layers together, to hide the folds around the tail, use wet-folding to put some nice shaping folds on the back, head, and legs, etc. Also, the nose can be turned into a lower jaw instead, a la many of Montroll’s animals.
So there you go. If you’ve been following along, and have gotten stuck or don’t like the way it turned out, remember: folding from a crease pattern is one of the hardest things to do in origami, and it takes practice. If you’ve gotten really stuck, email me or leave a comment and I’ll try to help you.
Have fun, and get to work on some more crease patterns!